Create and organize a project
Keep related conversations, instructions, files, and people in one place.
Choose a useful project boundary
A project is a shared home for one area of work. “Monthly business review”, “Catalog & pricing”, and “Operations” are good examples. Start a new chat for a new question within the same area.
Workspace members can create projects. You become a manager of a project you create. Other members need project access before they can use it; workspace owners and administrators can access every project.
Create your project
- Hover over the Projects row and select the plus, or choose Create project when starting out. The plus also appears when you reach it with the keyboard and stays visible on touch screens.
- Enter a clear project name and a short description of its purpose.
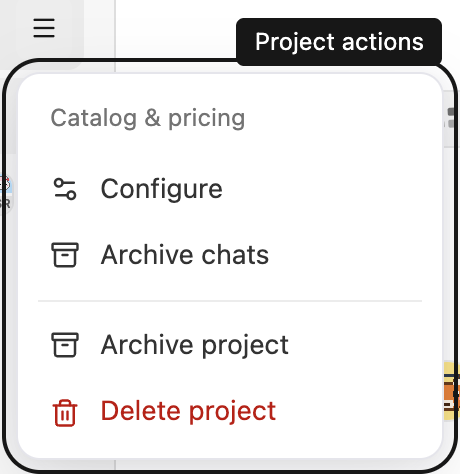
- Create the project, then hover over its row in the sidebar. Open Project actions (the three-line menu) and choose Configure.
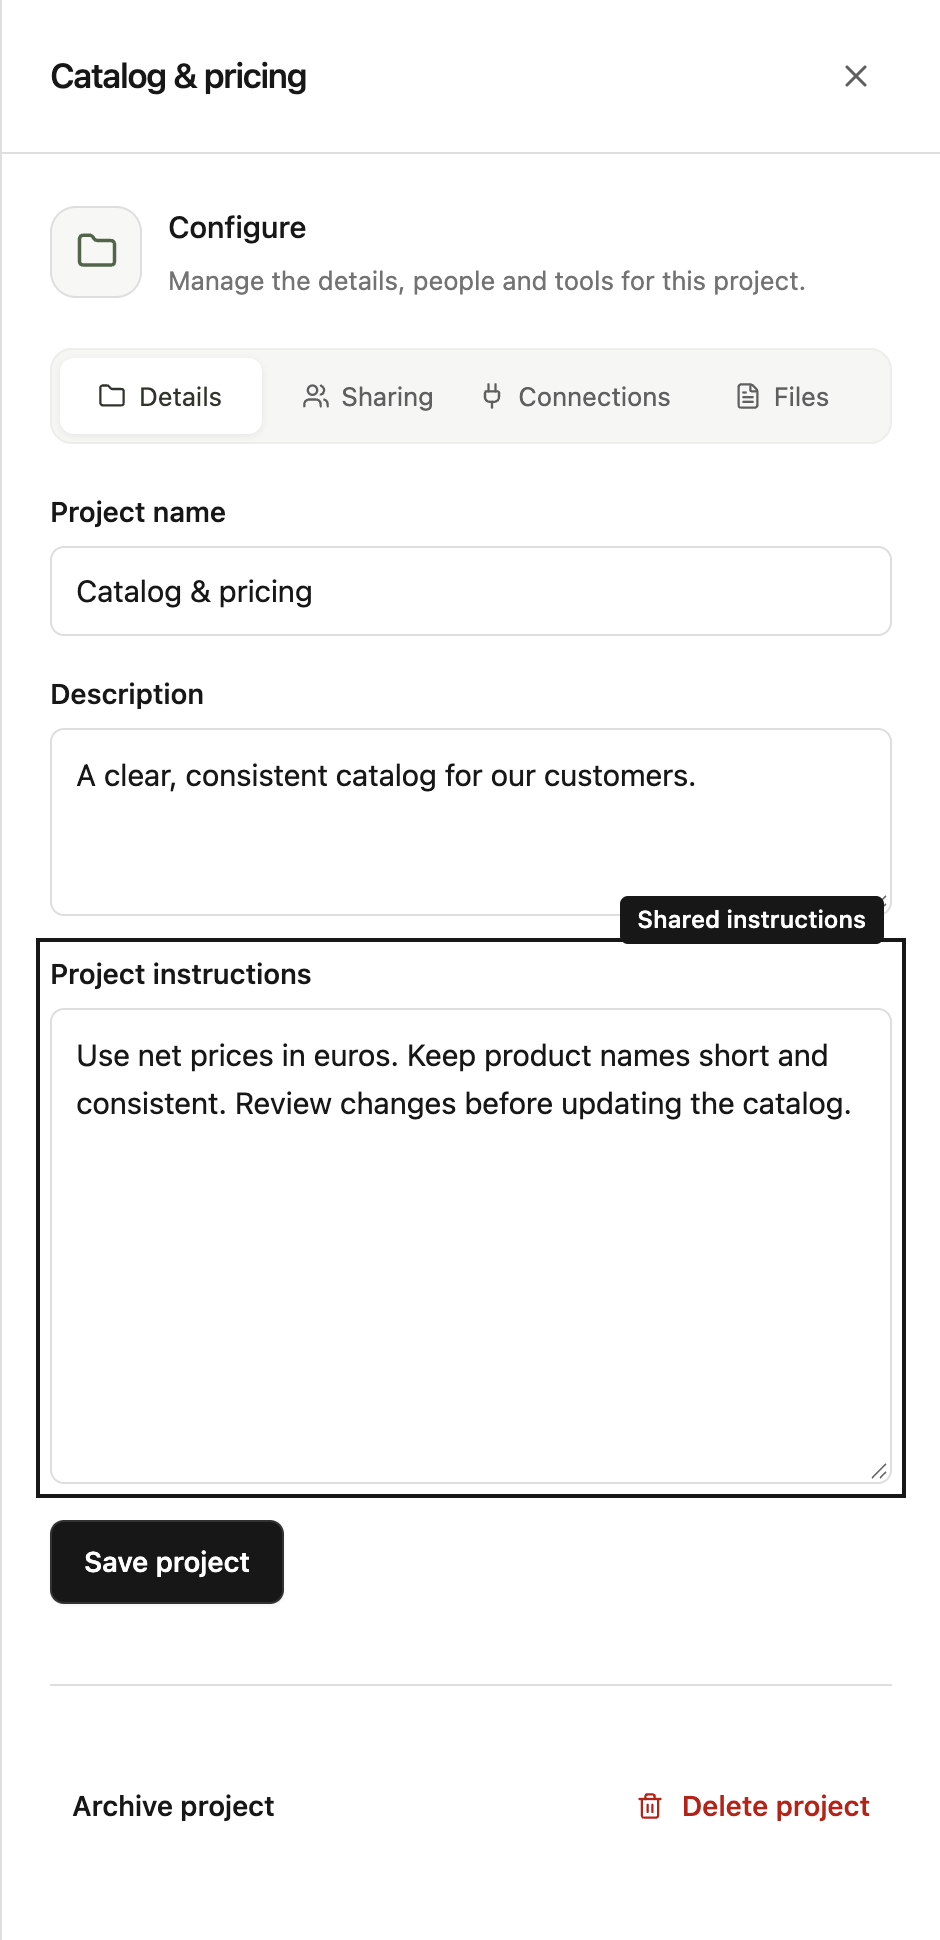
- In Details, add instructions that should apply to every conversation. Select Save project.
For example: “Use net prices. Report amounts in euros. Compare complete calendar months unless I ask otherwise.”
Bring the right people and tools
Use Sharing to give a person or a team access. Choose Viewer, Contributor, or Manager according to what they need to do. See project roles before giving management access.
Use Connections to select the business tools the project may use, then save. Selecting a connection does not give everyone permission to use it; each person’s connection access still applies.
Use Files for reference material the whole project should share.
Keep the sidebar manageable
Click the project name row to expand or collapse its chats. The new-chat and project-menu buttons have their own actions and keep the list open or closed as it is. The menu appears on hover or keyboard focus and stays visible on touch screens.
Contributors and managers can choose Archive chats from Project actions to archive every active chat in that project, including older chats outside the sidebar list. The project stays available. A notice offers Undo, and archived chats remain on the Chats page.
An expanded project starts with its five most recently updated chats. Select Show more underneath to load up to ten older chats at a time. Archived chats are excluded. Use workspace search to find an older conversation directly.
Archive or delete a project
When work is finished, a manager can select Archive project from Project actions. This removes it from the sidebar and the project list. Archiving is not the same as deleting the conversation history.
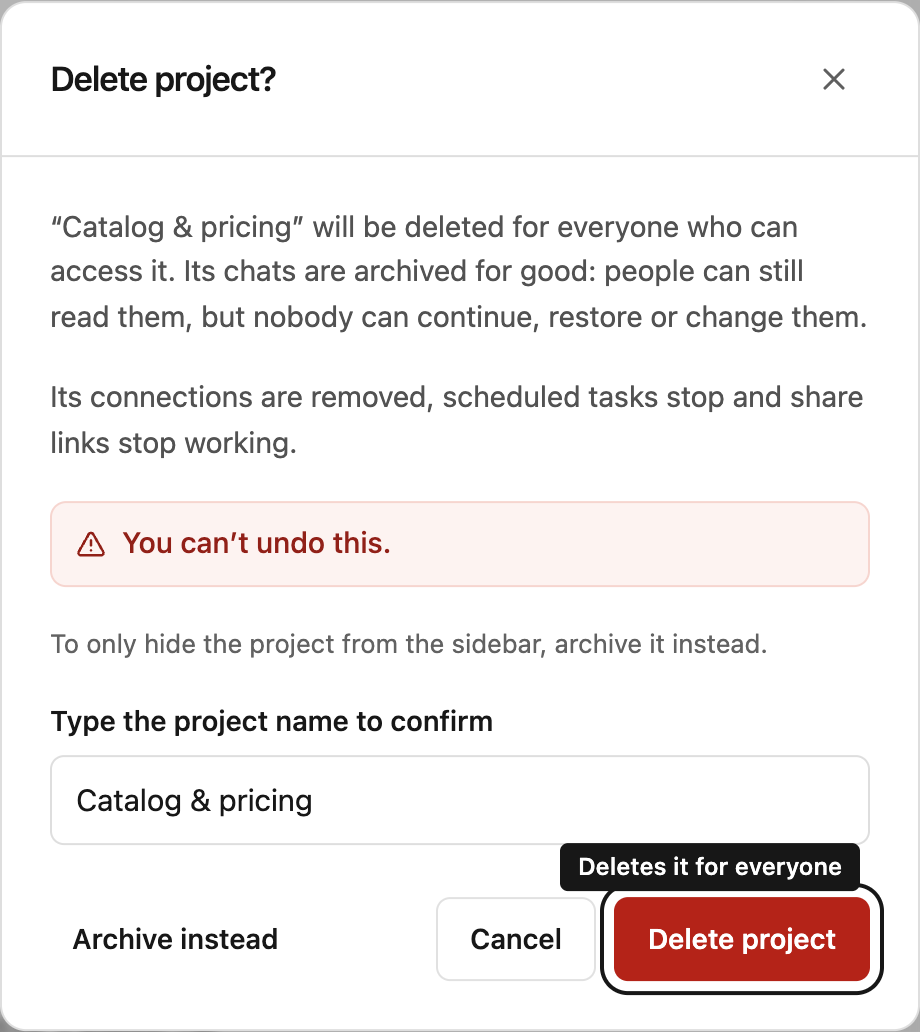
To remove a project for good, a manager selects Delete project from Project actions, types the project’s name and selects Delete project. Deleting applies to everyone with access:
- Every chat in the project is archived for good. People who had access can still read them on the Archived tab of the Chats page, but nobody can continue, restore or change them, because the project’s connections and context are gone.
- The project’s connections are removed from it. The connections themselves stay in your workspace.
- Scheduled tasks in the project stop, and public share links to its chats stop working.
You can’t undo this. You can’t delete a project while Steward is working or waiting for an approval in one of its chats. Usage the project caused stays in your usage reports, and the audit log records who deleted it.